swift에서 UIKit 을 다룰 때 storyBoard 를 사용하지 않고 직접 코드로 작성하여 사용하는 방법을 알아보았다.
1. storyBoard와 연결된 viewController 분리하기
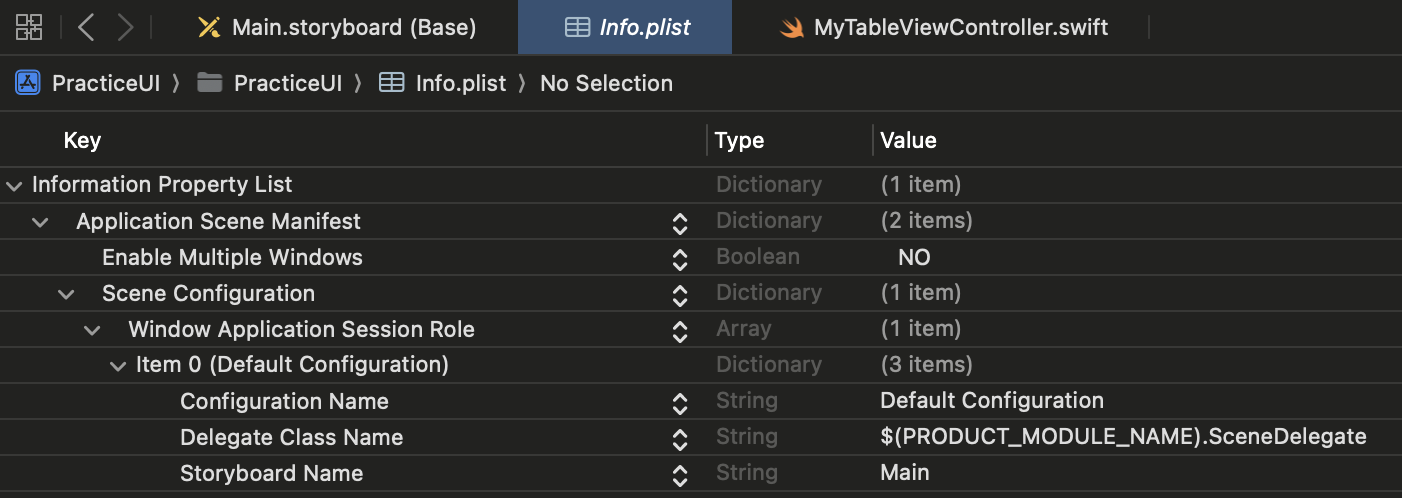
위의 사진처럼 info.plist 에 들어간 이후 Storyboard Name 에 마우스 커서를 올린후 삭제를 진행한다.
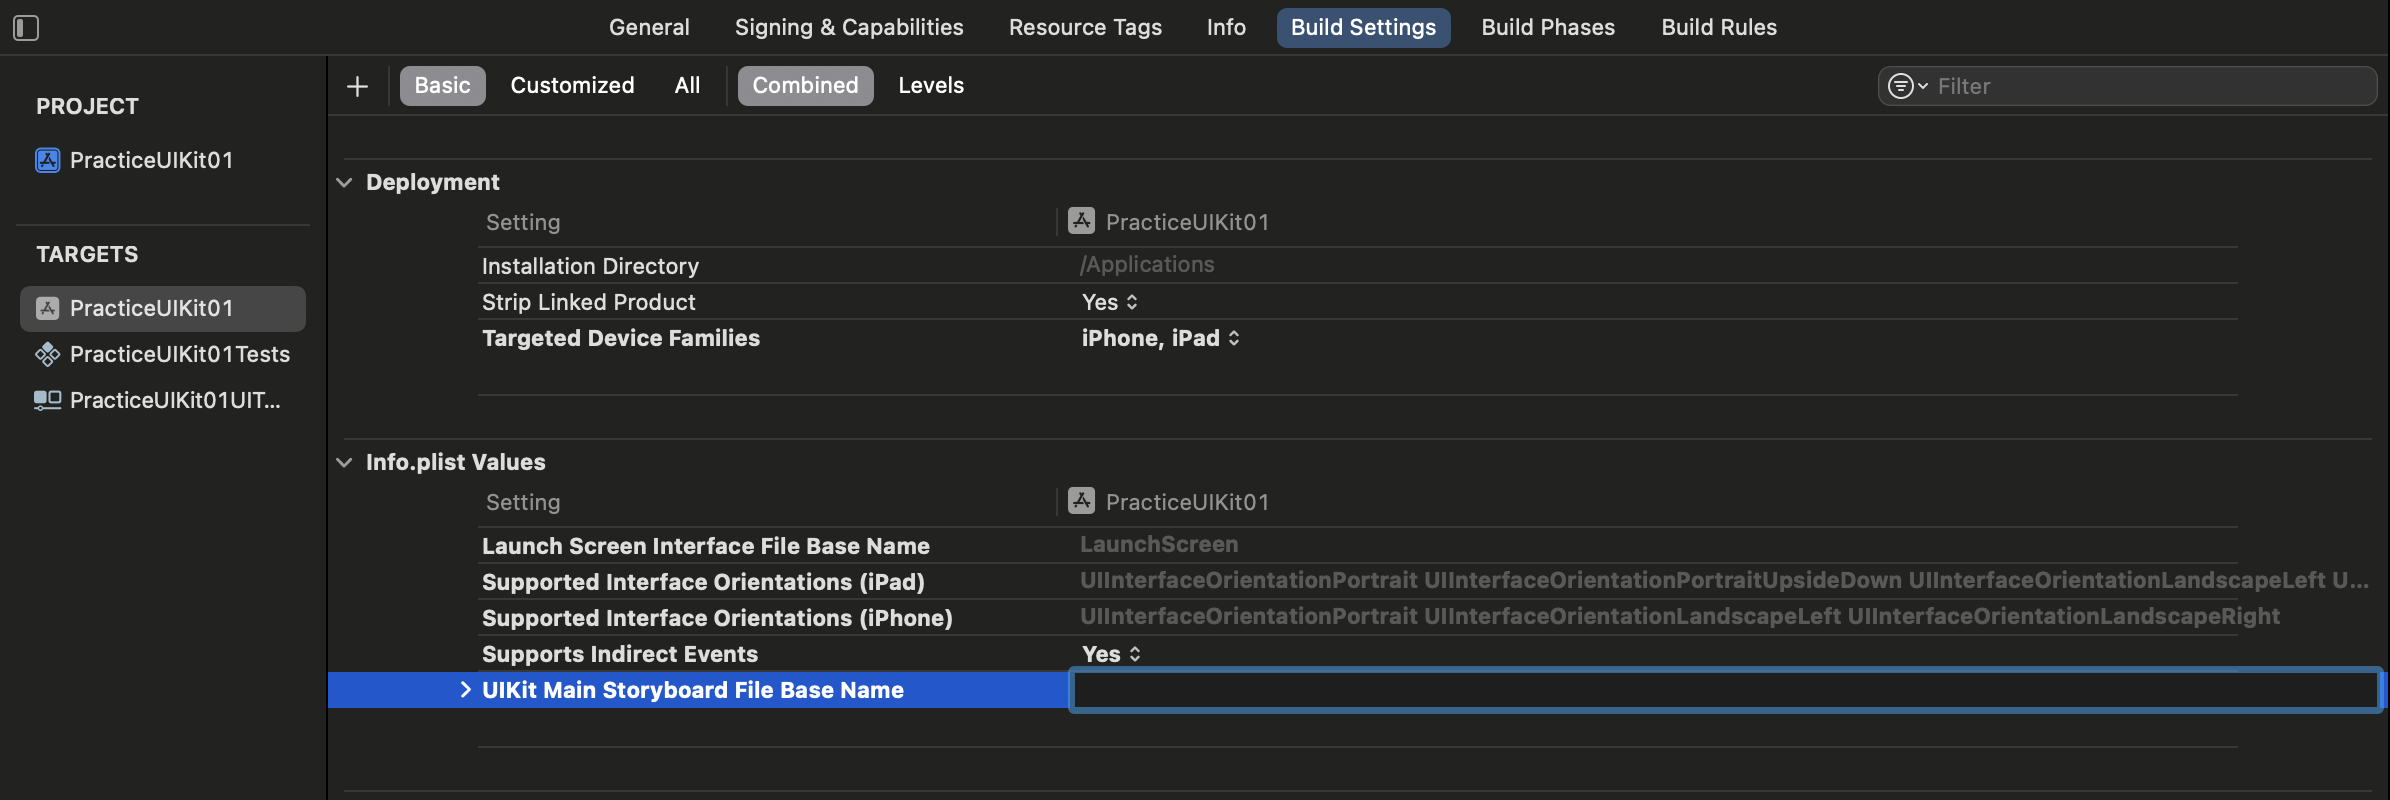
2. Build Settings 수정하기

프로젝트의 Build Settings 에 들어간 이후 UIKit Main Stroyboard File Base Name 이름을 지워준다.
아래의 사진처럼 더블클릭을 한 이후 Main 이라고 적힌 부분을 지워주면 된다.
3. MainStroyboard 삭제
4. SceneDelegate 파일 수정하기
lass SceneDelegate: UIResponder, UIWindowSceneDelegate {

    var window: UIWindow?


    func scene(_ scene: UIScene, willConnectTo session: UISceneSession, options connectionOptions: UIScene.ConnectionOptions) {
        guard let windowScene = (scene as? UIWindowScene) else { return }
        window = UIWindow(windowScene: windowScene)

        let mainViewController = <연결하고싶은 ViewController 클래스 생성>
        // ex) mainViewController = MyViewController()
        window?.rootViewController = mainViewController
        window?.makeKeyAndVisible()
    }

    ... 중략 ...
}
위의 코드 처럼 수정을 해주면 이제 storyboard 없이 직접 viewController 에 코드를 작성하여 화면을 구성할 수 있다.
'TIL(Today I Learned)' 카테고리의 다른 글
| 2024.04.26 Today I Learned (1) | 2024.04.26 |
|---|---|
| 2024.04.25 Today I Learned (0) | 2024.04.25 |
| 2024.04.19 Today I Learned (1) | 2024.04.19 |
| 2024.04.18 Today I Learned (2) | 2024.04.18 |
| 2024.04.17 Today I Learned (1) | 2024.04.17 |
